Getting Started
🚀 Quick Start
Step 1: Install Chimr
- Download Chimr from the Mac App Store
- Open the app after installation
Step 2: Prepare Your Calendar
Before using Chimr, ensure your calendar is properly set up by following these steps.
-
If Chimr is running, quit it first
- Right-click the Chimr icon in the menu bar
- Select “Quit”
-
Add calendar accounts to macOS Calendar app
- Open Calendar.app
- Follow Apple’s guide to add accounts
- For Google, Outlook, or iCloud calendars, add them in their respective apps first
-
Enable calendar visibility settings
- In Calendar.app, go to View menu
- Enable both of the following options:
- ✅ Show All-Day Events
- ✅ Show Declined Events
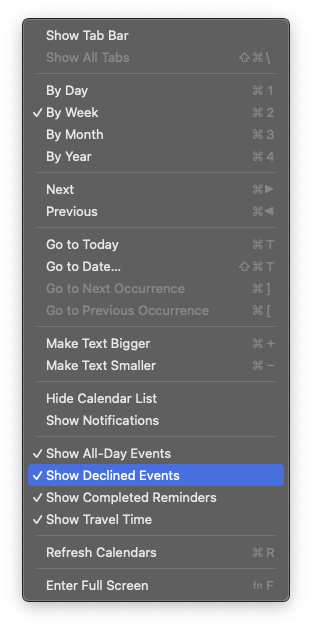
⚠️ Important: Events hidden in Calendar.app won’t appear in Chimr due to EventKit limitations.
Step 3: Launch and Configure Chimr
- Launch Chimr
- Grant calendar permission when prompted
- Click “OK” to allow access
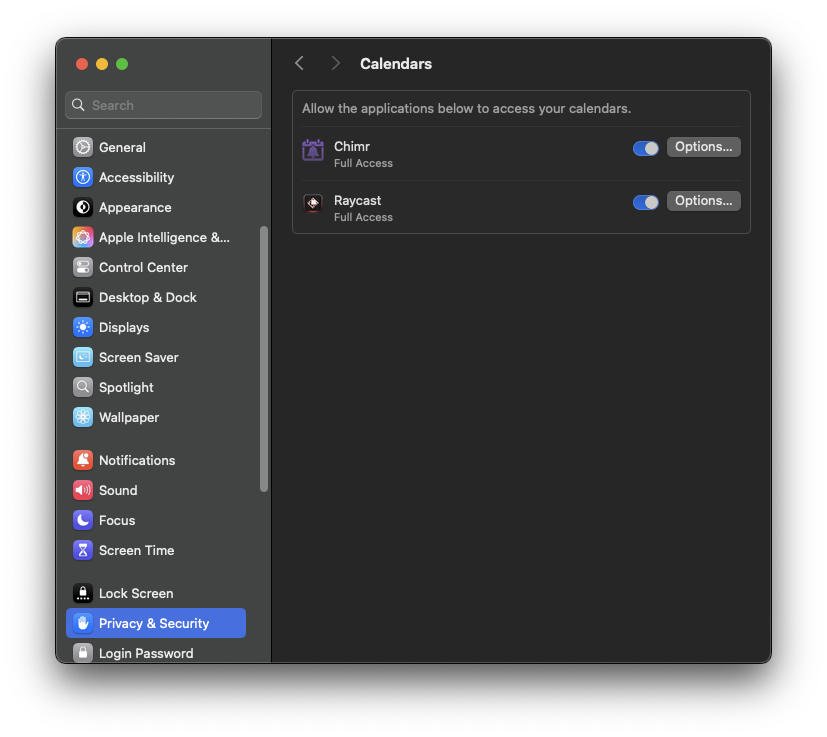
- If you accidentally denied access, follow these recovery steps.
- Go to System Settings → Privacy & Security → Calendar
- Check the box next to Chimr
TBD: Screenshot - Calendar access permission dialog
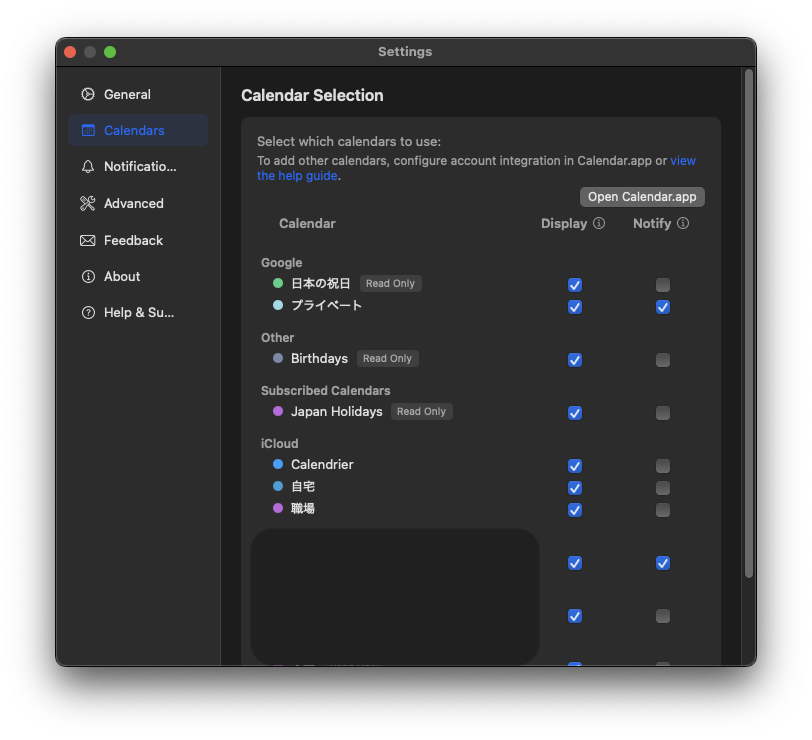
- Select your calendars
- Right-click the Chimr icon in menu bar
- Select “Settings”
- In the “Calendars” tab, choose which calendars to display and notify

Step 4: You’re Ready!
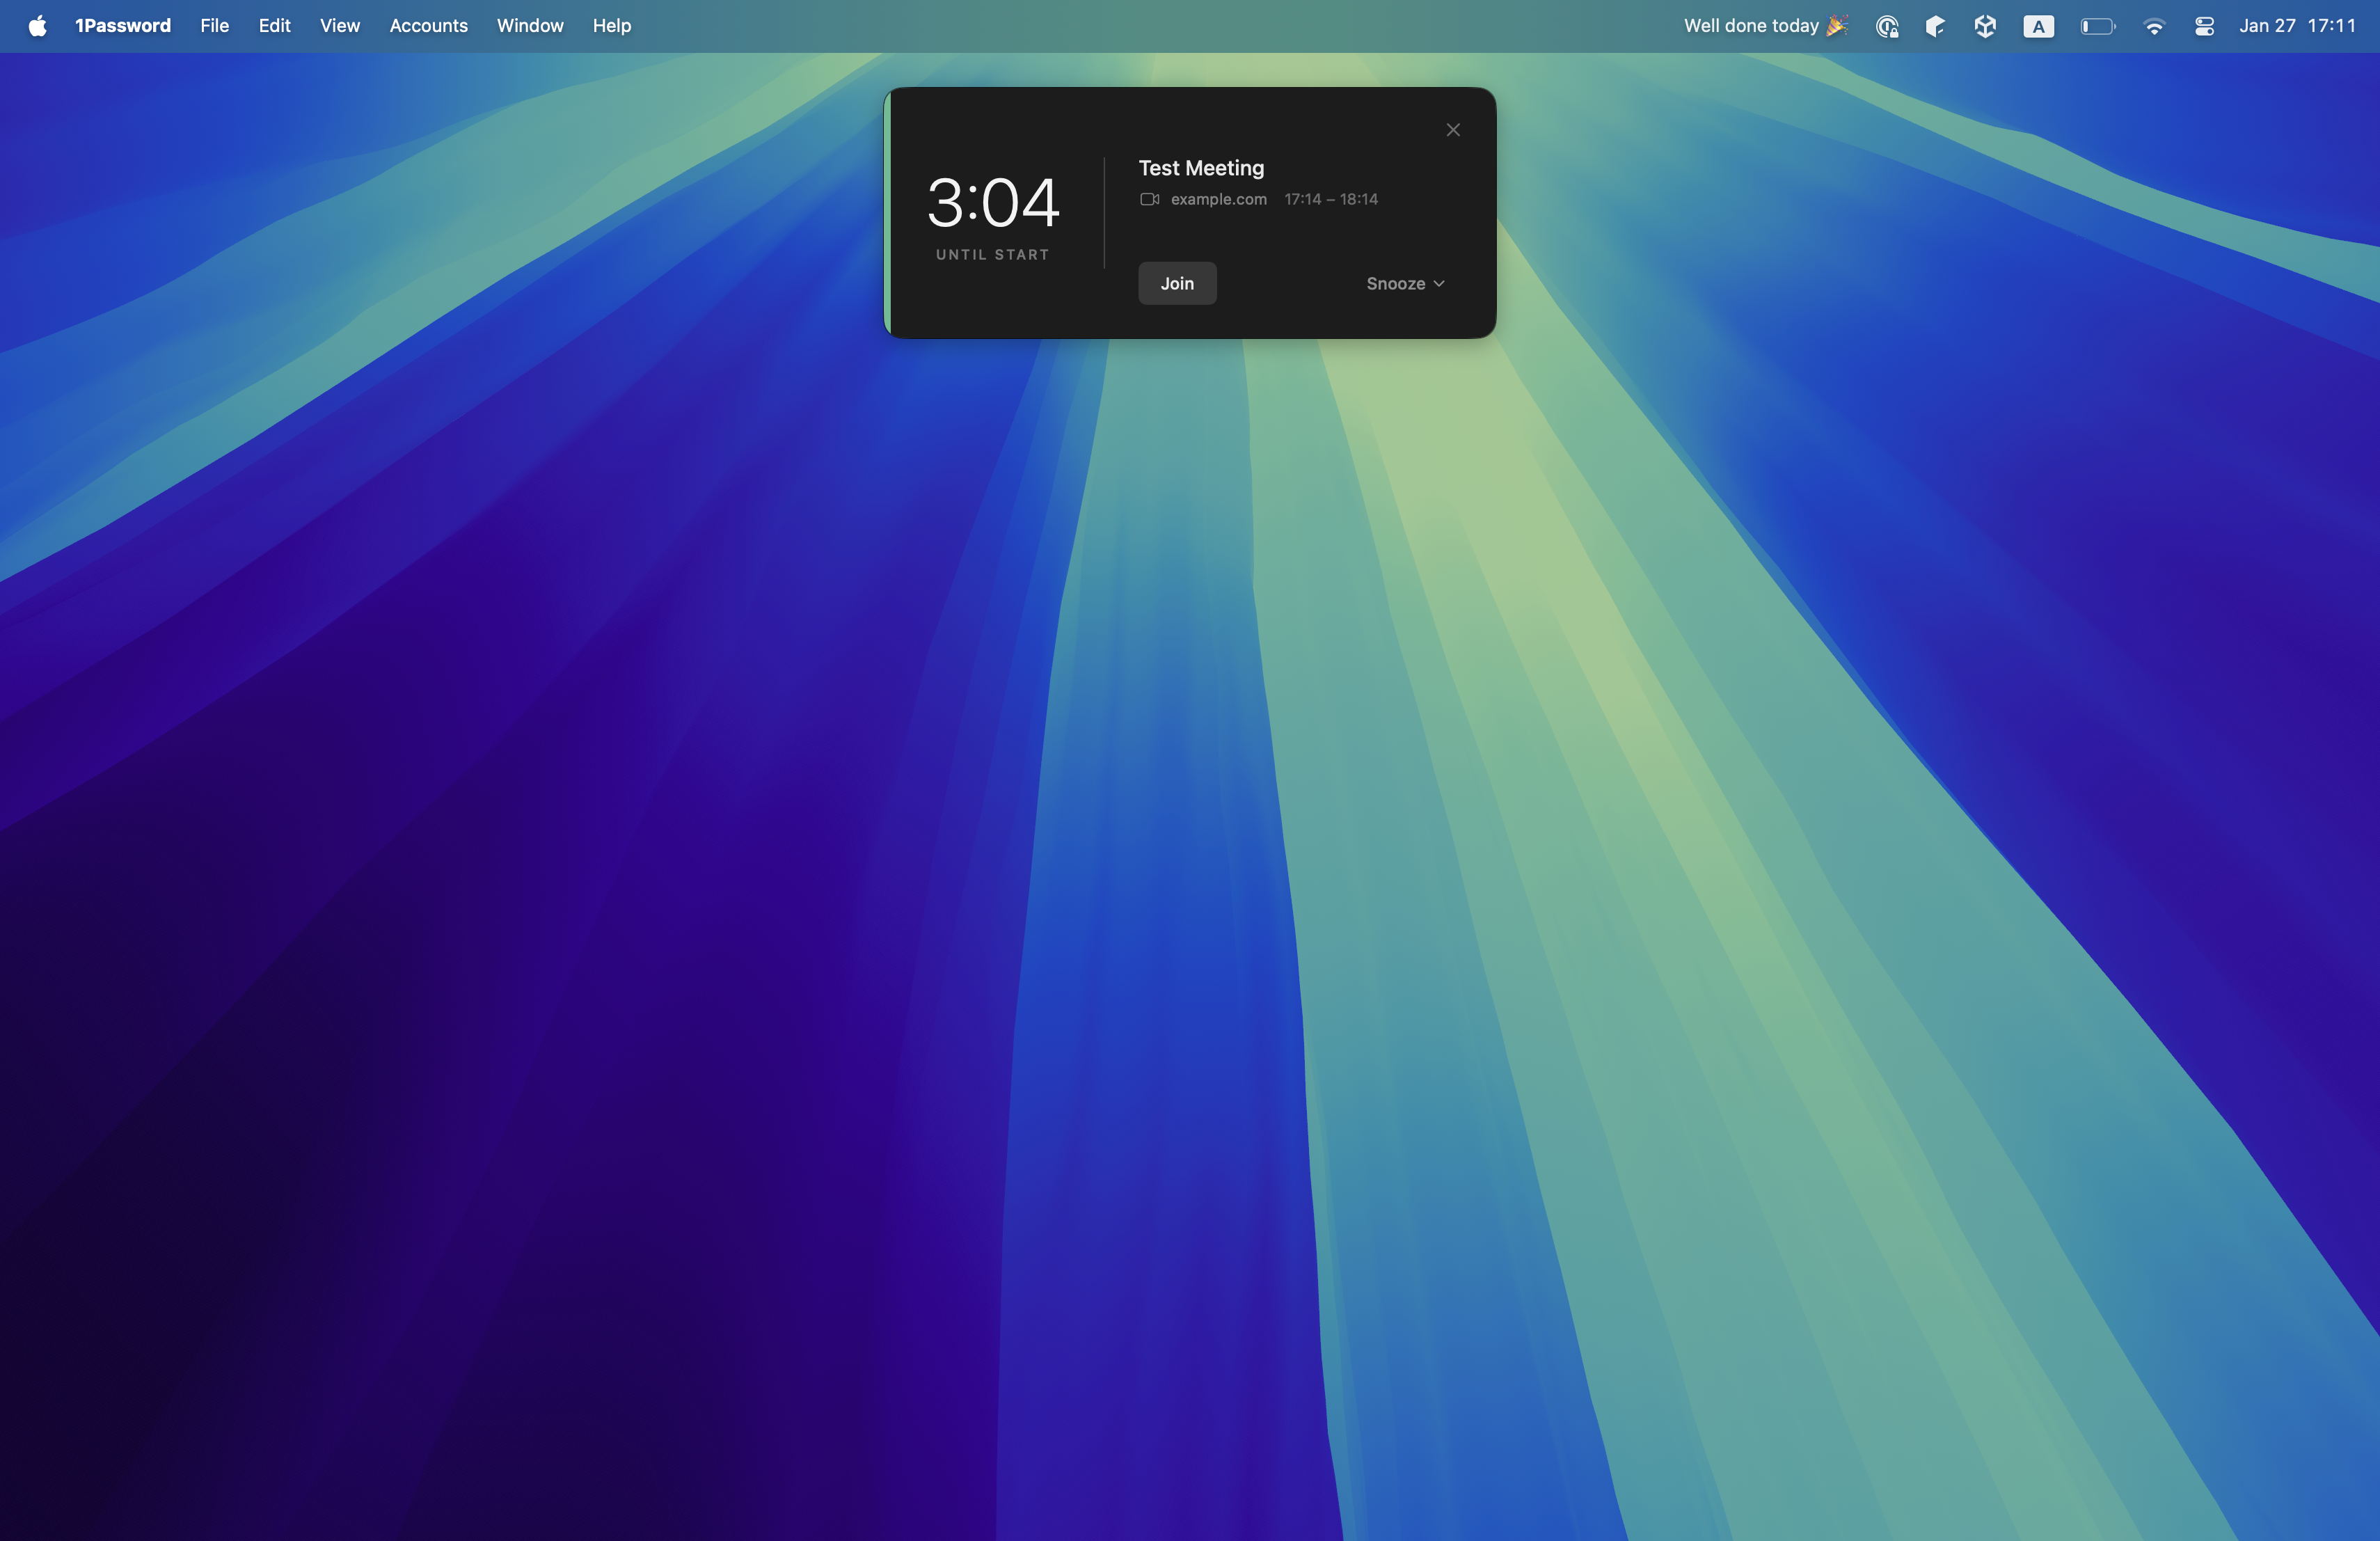
- Click the Chimr icon to see your events
- Notifications will appear before meetings
- Customize in Settings as needed

📌 Next Steps: Learn about all features in the Features section
Need Help?
- Features: Learn about all features in the Features section
- Support: Check our Support page for troubleshooting